Showing posts with label how-to. Show all posts

Sunday, December 22, 2013

Dress Up Station for Christmas!

We, I mean I, decided way back this summer that The Kid was going to get a dress-up-trunk for Christmas.  I knew that I could score some deals on clearance Halloween costumes the day after Halloween and make it really special without spending a whole lot of money.  What is it with me and big Christmas projects... did you see the play kitchen I made last year?  If you missed it you can check that out Here.

I put out an APB on Facebook and some swap-buy-sell pages that I was looking for a dresser to refurnish, I mean SOMEBODY has to have a beat up dresser they want rid of right? No. I had like two hits on my posts, and they weren't the size or make I was looking for, I mean beggars can't be choosers but if I'm going to re-purpose it I don't want to spend $80 on a used dresser just to tear it apart.  I figured something would come along or I'd scrap the idea for another year. *Just* as I was about to give up my friend Jamie came to the rescue when I posted this link from Pinterest to show what I was looking to do: http://www.pinterest.com/pin/10836855322982382/

She had made one for her girls, and they've pretty much outgrown it.  And like the "awesome" blogger that I am... forgot to take a good before picture.  Anyway it was perfect, it already had all but the bottom drawer taken out, so all I had to do was cut a board to make a shelf above the drawer (Which turned into a bigger project than I intended, and had to get The King to help with that)  

So I've had this in my possession since probably early September, you know, when it was warm enough to paint it outside?  Yeah, procrastinator is my middle name, so here it is, the weekend before Christmas and I'm finally ready to paint, even though I had already purchased spray paint for the project I went and bought wall paint, figured I could kill two birds with one stone and use it to paint The Kid #2's dresser (another post for another time) Anyway enough of me talking, you're here for pictures. 
So here we go, starting to paint.
Inside, coat one (Ignore the room... The Kid's playroom is a disaster at the moment because it's turned into storage for a bunch of stuff (I"m working on that!)


Yeah, I told you the room was a mess... Anyway, coat 1 done, let it dry overnight


After coat #2, let it dry overnight again...

Next step, frosted lace contact paper on the back and shelf 
(it's so pretty, this picture kind of sucks)

Smooth out all the bubbles (I used a pampered chef pan scraper, I did one long sheet down the back, across the "shelf" and down over the lip.  I used packing tape to further seal off the edge on the inside of the lip (where the drawer goes) as the wood on that part was kind of uneven and it wouldn't stick well 

Add a tension rod & some hangers

I bought a drawer pull... dummy me didn't measure it and bought a 3" pull, I need a 4" which I'll pick up tomorrow when I go to town.

I added a key rack on the side to hang necklaces, and will be picking up a small mirror, I picked up a full length one, but it's way too big for the side, so I'm going to see what else I can find.  

It's all ready for Santa to come!  I covered with a blanket, turned it around backwards towards the wall, and am going to hope the 2 year old doesn't notice since it's actually been in plain sight since we got the thing I don't think she'll pay too much attention to it.  We wrapped up all the costumes and dress up accessories we bought so we'll put it all together on Christmas Morning and I'll share her reaction :)  Thanks for stopping by!!


Monday, October 28, 2013

Butternut Squash Soup

So I set out to make a butternut squash soup this weekend, I had no recipe... just a few ideas from various recipes I've made recently.  I found this beautiful huge butternut squash at the grocery store, and just went with it

I peeled and "gutted" the squash, drizzled with olive oil, salt, pepper & brown sugar...

Meanwhile I chopped up a large yellow onion

Put it in the frying pan with some butter to soften up

Peeled 3 carrots...

Julienned them

Chopped 3 stalks of celery

added these to the mix as well in the frying pan and let them soften together a bit.

Took the squash out of the oven and gave it a rough chop

and dumped it all into the crock pot

I added one box of chicken broth, a tsp of nutmeg, a tablespoon of cinnamon, and some more salt and pepper and let it simmer for a couple hours...


I came back and tried to mash it, but it was still pretty chunky, so I added a pint of cream, and put it in the blender little by little to make it smooth.  It was SOOOOO good!!! Not bad for winging it.  I'm really glad it turned out so I didn't waste my time taking all these step-by-step pictures I'd then have had to destroy so you all wouldn't see them :) 

Recipe:

The King The Kid & I
Butternut Squash Soup

1 large butternut squash
1 large yellow onion
3 carrots
3 celery stalks
32 ounces Chicken Broth
1 pint heavy cream
1tsp brown sugar
1 tsp Nutmeg
1 Tbsp Cinnamon
Salt & Pepper
Olive oil
butter

1. Cut the squash in half, peel & "gut" it.  Drizzle with olive oil, sprinkle with salt and pepper, and brown sugar, bake 1 hour at 325 degrees

2. Chop onions, sautee on medium heat with butter just until transparent and softened

3. Chop or julienne carrots and celery (I'd skip the julienne if you plan to puree it anyway, too time consuming)  and add to pan with onions

4. Chop squash, add with other veggies in a crock pot, add chicken broth, nutmeg, cinnamon, salt and pepper, stir and allow to simmer, about 2 hours (you can adjust this, at this point it's just to further soften the squash and let the flavors come together)

5. Mash the "soup", or use an immersion blender (I covet an immersion blender), or a regular blender to puree the soup

6. Serve hot with biscuits. Enjoy!! Yum :)


Saturday, January 12, 2013

Homemade Detergent

About 9 months ago we (obviously I mean I) started making our own laundry detergent, cloth diaper detergent and fabric softener.  I tried dishwasher detergent too, but didn't like how it came out, which doesn't matter now because our dishwasher is broken :(.  Anyway, there were many "recipes" on Pinterest, I used this one.  One batch lasted us over 9 months, we still have one container left, but had time so I made a new batch.

I have the list of recipes typed out and mounted on the inside of one of our cupboard doors above the washing machine


Grate 1 bar of Fels Naptha


Try not to pull an Angel and grate your finger (That REALLY REALLY hurt!!)

Melt soap in a saucepan with 4 cups of hot water on Medium Low heat, stirring occasionally

Add 1c. Washing Soda and 1/2 c. Borax to 2.5 gallons of hot water

When all melted add to 5 gallon pail 

Stir then fill rest of way with hot water


Cover then let sit overnight. 

The next day take a long paint stick and stir up (it will have gelled), Fill plastic laundry detergent bottles half full with mixture, and fill the other half with warm water, shake to mix.  Before each use shake up the bottle as it sometimes will gel while it sits.  

I fill up 2 bottles that sit on my dryer, when one empties I refill it from this 5 gallon bucket which is stored next to our toilet behind the trash can... not pretty, but it works for now.  

The next day I opened it up to a nicely gelled detergent. 

I stirred it up with my paint stick as much as I could... when that wasn't working well i dug my hands in and squished it with my fingers.... it was much more fun than it should have been - though very cold!!  Using a large measuring cup I poured detergent into bottles - half full, then added warm water and shook it up.  Don't forget each time you use it you'll want to shake it to make sure it hasn't gelled sitting there (I find it's not too bad unless the bottle has sat a long while.)  

Please let me know if you try this out or if you have any other frugal DIY cleaners I should try, and stay tuned, I'll write soon about our cloth diaper detergent & fabric softener!


Sunday, January 6, 2013

Grammy's fresh baked Bread


Today I set out to bake bread. A good way to spend a lazy Sunday :) It's only the 4th or 5th time I've ever done it, so I have definitely not perfected it, but I'd love to share my Grammy's recipe.

Grammy's recipe in my Mom's writing (See below).  This is the recipe my mom always uses, that she learned from my dad's mom when they first were married!


 (I varied this time and added the 2 pkgs yeast right to the water instead of sifting in with other ingredients because I was worried whether the yeast was still active or not, the packet looked like it had been in the cupboard for quite a while!
 
Add oil (1/3 cup)

Add flour 2 cups at a time until kneading consistency (My doughy hands didn't get any pics of this step)

Knead dough on floured surface

Add a Tbsp of oil to bottom of bowl

Put kneaded dough in top side down


Then flip over so top has oil on it as well as bottom

Cover and let rise in a warm spot

...waiting stinks!...
Now my favorite part! Punch it down!!! 


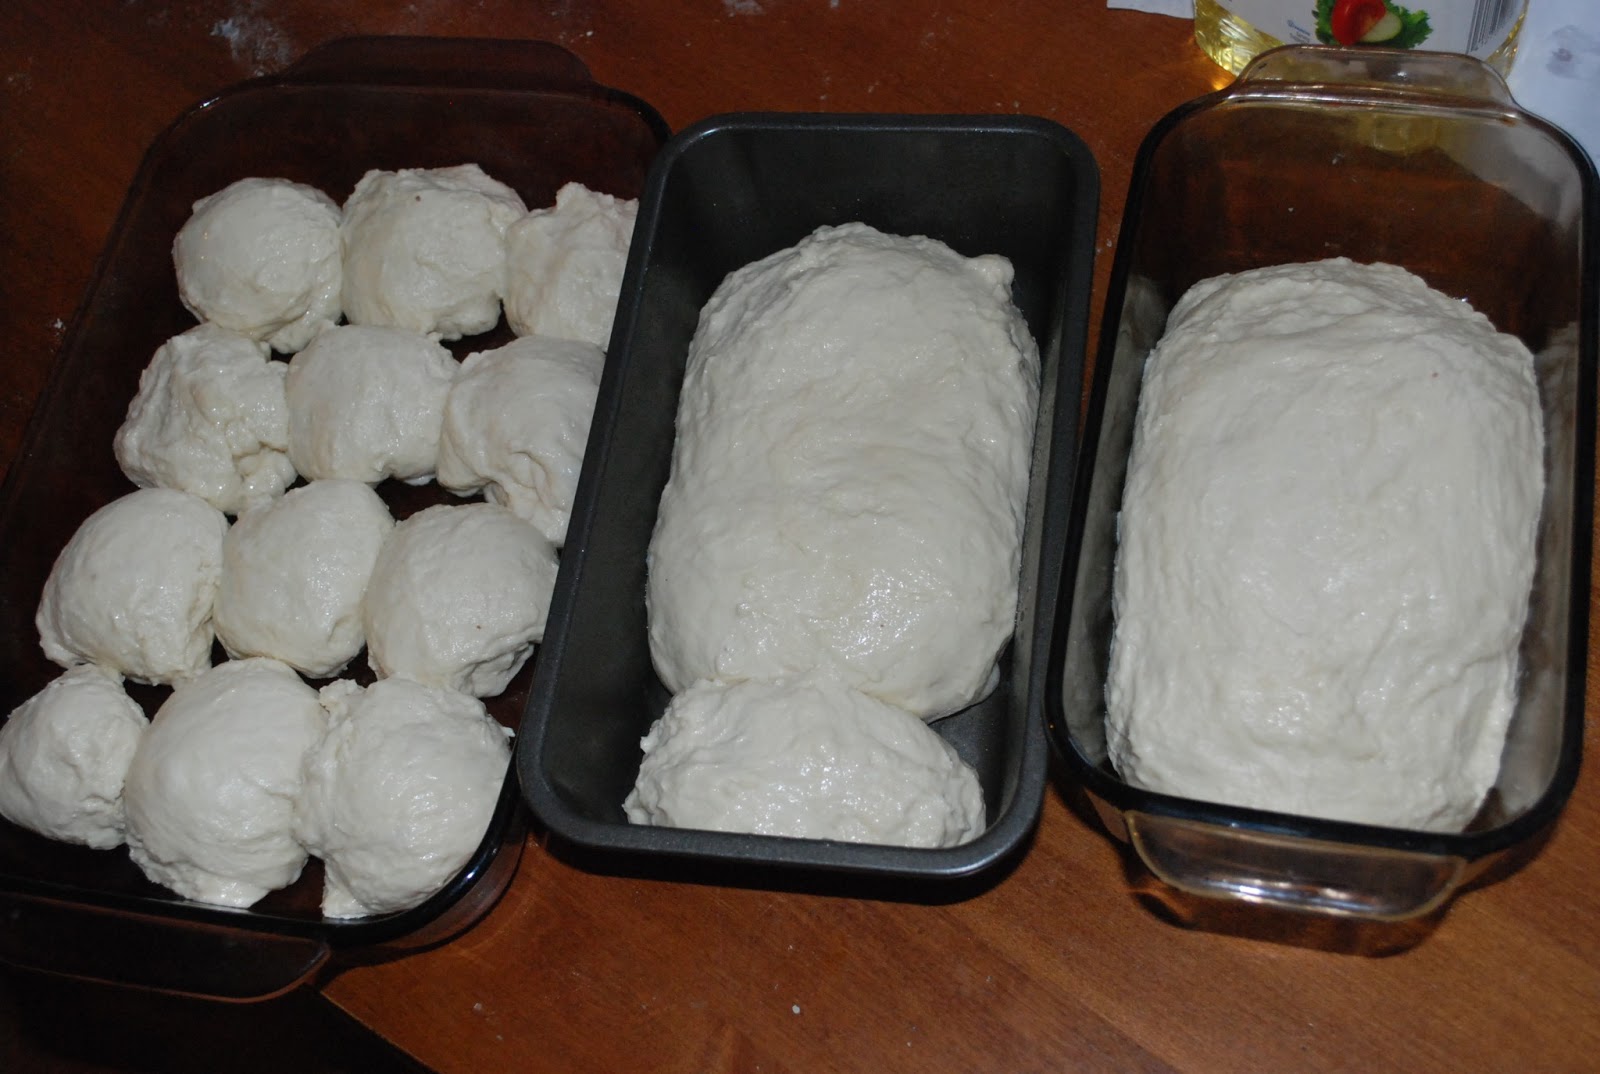
Grease the pans, I put some vegetable oil in and spread it out with a paper towel. 

Ready for second rise! Back to someplace warm and covered with a towel...
More waiting!!


Butter surfaces while warm. 

Let cool in pans for a few minutes then move to cooling racks.  Allow to completely cool before storing in bags. 

My favorite part: Enjoy!! 

(Kid approved!) 


Grammy's Bread Recipe:

  • 1 Qt Lukewarm (bath temp) water
  • 1/3 c. Vegetable Oil
  • 1/2 c. Sugar
  • 1 1/2 tsp Salt
  • 2 envelopes of rapid rise yeast
  • Flour - 2 cups at a time (I used about 8 cups for this recipe, and some more when I kneaded it)
Start out with your quart of water in a big bowl, add vegetable oil.  Sift in 2 cups flour, sugar, salt and yeast. Stir to mix, separate any lumps.  Add 2 cups of flour at a time stirring after each. Once a soft/knead-able consistency put out on floured surface adding flour as needed to knead until no longer sticky.  Make sure to knead well to get out any air bubbles.  Wash out your bowl, add about 1 Tbsp oil to bottom of bowl, put bread dough in top side down, and roll over so both top and bottom get coated in the oil.  Put in warm spot, cover and let rise until doubled.  Punch down, separate into pans, or roll into rolls if you prefer.  Cover, allow to rise again to doubled size.  

Bake at 400-425 Degrees 
30 minutes for Bread
20 minutes for Rolls